United States


-
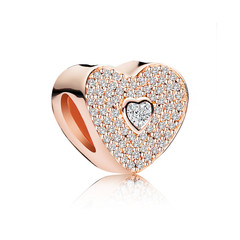
 $17.95 $44.00
 -
$17.95 $44.00
-
 $25.95 $49.00
How to Apply Clip In Hair Extensions
Clip in hair extensions are an easy way to achieve temporary length without spending a fortune at the salon for heat-applied extensions or a full sewn-in weave. Use clip-ins to add length for a day or special occasion, or apply them every day to maintain a long hairstyle. Experiment with the placement of your clip-in extensions to blend them as much as possible with your real hair.
Instructions- 1.Make a part above the nape from ear to ear to attach the shortest hair extension.
- 2.Smooth the rest of your hair away from the part and secure with a hair clip.
- 3.Slide the comb of the clip onto the roots of the part, and push the clip closed to secure. Tease thin hair at the root of the part so the comb has more bulk to attach to.
- 4.Remove hair from the hair clip and part it again from ear to ear, 1 to 1 1/2 inch above the first extension. Apply a longer hair extension and continue adding to the back of the head.
- 5.Attach the shorter pieces to the sides of your head, above the ears, to frame your face, and blend hair.
- 6.Comb your hair to blend the extension hair with real hair.
How to Apply Weft Hair Extensions
Weft hair extensions can be purchased from most beauty supply stores in either synthetic fiber or 100 percent human hair. Wefts are strands of hair that are woven into long, cloth bands. The bands, not the actual extension hair, are what you attach to your natural locks. Wefts are applied to your hair with a special type of latex glue made specially for hair extensions. Give your hair the length and body you want by applying weft hair extensions.
Instructions- 1.Create a horizontal part across the back of your head about 2 to 3 inches from the nape of your neck. Clip the rest of your hair away.
- 2.Measure the part and cut a weft slightly smaller than the measurement.
- 3.Apply a thin line of glue along the rough side of the band at the top of the weft.
- 4.Press the glue-side of the weft along the part, about 1/4 inch from the roots. Lightly press your fingers all along the weft.
- 5.Hold the extension in place for about 30 seconds to allow the glue to dry. Unclip your hair and create another horizontal part across the back of your head about 1/2 inch above the first part.
- 6.Repeat the applications until you reach just below the crown of your head. Extensions applied any higher will be visible.
- 7.Make a horizontal part about 1/2 inch above your left ear. Cut a weft slightly smaller than the part and repeat the applications until you reach just below your temple. Repeat this process for the other side of your hair.
How to Apply Micro Ring Hair Extensions
Micro ring hair extensions using the newest technique in applying hair extensions. Micro rings, or micro cylinders, are a way to extend the natural hair without using complicated sewing or messy glues. Customers and hair stylists love the technique, because not only are micro ring extensionseasy to install, they are also lightweight and flexible. The other benefit to using micro rings is that they are completely safe for the natural hair. Other techniques threaten the health of the hair by causing it stress and pulling it out upon removal. Micro rings remove this risk and help keep the hair healthy and vibrant.
Instructions- 1.Shampoo and condition the natural hair with a mild moisturizing shampoo and conditioner. It is very important to install hair extensions in clean, dry hair. Because micro rings can last for a while, you want all the dirt and debris to have been removed from the hair and scalp so the pores aren\'t clogged. Completely dry the hair before continuing
- 2.Separate the hair into four workable sections: two in the front and two in the back. Hold the hair in place with clips.
- 3.Push the pulling needle through one of the micro ring tubes. Push it all the way through, so the needle is showing on the other side.
- 4.Starting with one of the back sections, partition off 1 inch of the hair in a straight line. Separate the hair again into very small sections. Starting with one small section, slide the hair through the micro ring tube.
- 5.Take a portion of the extension hair and insert it into the tube as well. The hair should already be in pre-tipped portions. Work with one portion per section.
- 6.Use the closer tool to flatten the micro ring. This closes the tube and attaches the extension hair to the natural hair.
- 7.MRepeat Steps 4 to 7 on the remaining sections of the hair until all of the extensions have been applied. To make the hair look completely natural and cover up the micro rings, leave a small section in the front undone. When you\'re finished, curl or style the hair as desired.
HOW TO APPLY TAPE IN HAIR EXTENSIONS
Hair extensions are a fun, easy way to give new life to your hair. Extensions can add length, volume and color to your tresses. There are a few different types of hair extensions, but one of the easiest types to apply yourself is tape in hair extensions Using a double-sided tape, you can apply these extensions with minimal damage to your hair. Tape hair is very easy to apply and can be instantly applied to parted areas of the head. It is simple , completely invisible and giving all natural appearance. It looks like the hair is growing from your own scalp The hair is hand sewn into a a clear skin base and then, is attached to a durable double sided invisible adhesive tape.
Instructions- 1.Pretaped Extensions: There are many beauty-supply brands that offer pretaped extensions. EasiLites, Simplicity and Unique VIP Tapex extensions are just a few. These extensions typically come in precut wefts with the tape already attached to the bond. The tape has a protective covering that is peeled off when applied to the hair.
- 2.Regular Tape Extensions: Some extensions simply come in wefts and the tape needs to be purchased separately. Special hair-extension tape can be purchased at any beauty-supply store. One example is Batistone tape extensions, which are wefts with a clear, flexible mounting base where the bond is. The tape is double-sided, and is applied directly to the mounting base. After you have securely attached the tape to the base, you can cut any excess tape off the ends so that it fits properly on your hair extension. When you are ready to attach the extension, simply peel the backing off the tape and stick it to your hair.
- 3.Preparation: There are a few things you will need to prepare for the addition of your extensions. First of all, your hair needs to be clean, dry and absent of styling products. Greasy residue from dirty hair or product buildup will make it difficult for the tape to stick to the hair. Use a rat-tail comb to create a horizontal straight part in your hair. A rat-tail comb is simply a comb with a long, tapered handle. The tapered end, or rat-tail, is what you use to make the part. If you are doing a full head of extensions, start from the nape of your neck and work your way up. If you are adding just a few extensions for color or highlights, make your part just below the crown of your head. When you slide the rat-tail under your hair to make the part, determine if the section is too thin by seeing if the rat-tail is visible through your hair. If you can see the rat-tail of the comb, you will be able to see the bond of the weft. A good way to prep the area is by dipping a cotton ball in alcohol and lightly sweeping it across your strands at the part. This will reduce the amount of oil near the root, making attachment easier. Don\'t soak the cotton ball, since alcohol can severely dry out your hair.
- 4.Application: When applying pretaped extensions, you will notice that the ends of the tape extend past the bond of the weft to create tabs. This is because most pretaped extensions actually wrap all the way around your hair. Peel the backing off the tape and select a thin section of hair right below the part. Depending on the size of the precut wefts, the width of the section of hair you choose will vary. Stick the extension a couple of millimeters below the root; then lift the section of hair. You will be able to see the two tabs of excess tape sticking out from the sides of the hair. Fold the tabs toward each other, sticking to the underside of the section of hair so they meet in the middle. When applying regular tape extensions, attach the tape to the mounting base. You can either cut the tape to the size of the extension or leave tabs of tape and attach the weft to your hair in the same manner as a pretaped extension. Creating these tabs and folding them over the underside of the section of hair will result in a longer-lasting extension.